
Teams
Group work into Segmind teams, switch between workspaces, invite members with Admin or Member roles, and track team usage.
A team is a shared workspace. Everyone in a team works against the same credit balance and the same Pixelflow library, so a team is the unit you use to collaborate and to keep one project's spend separate from another's.
Every account starts with a Personal workspace. Any teams you create or are invited to appear alongside it, and you are always working inside exactly one of them at a time.
Switch workspaces, or create a team
Your current workspace is shown at the bottom left of the console. Click it to open the switcher.
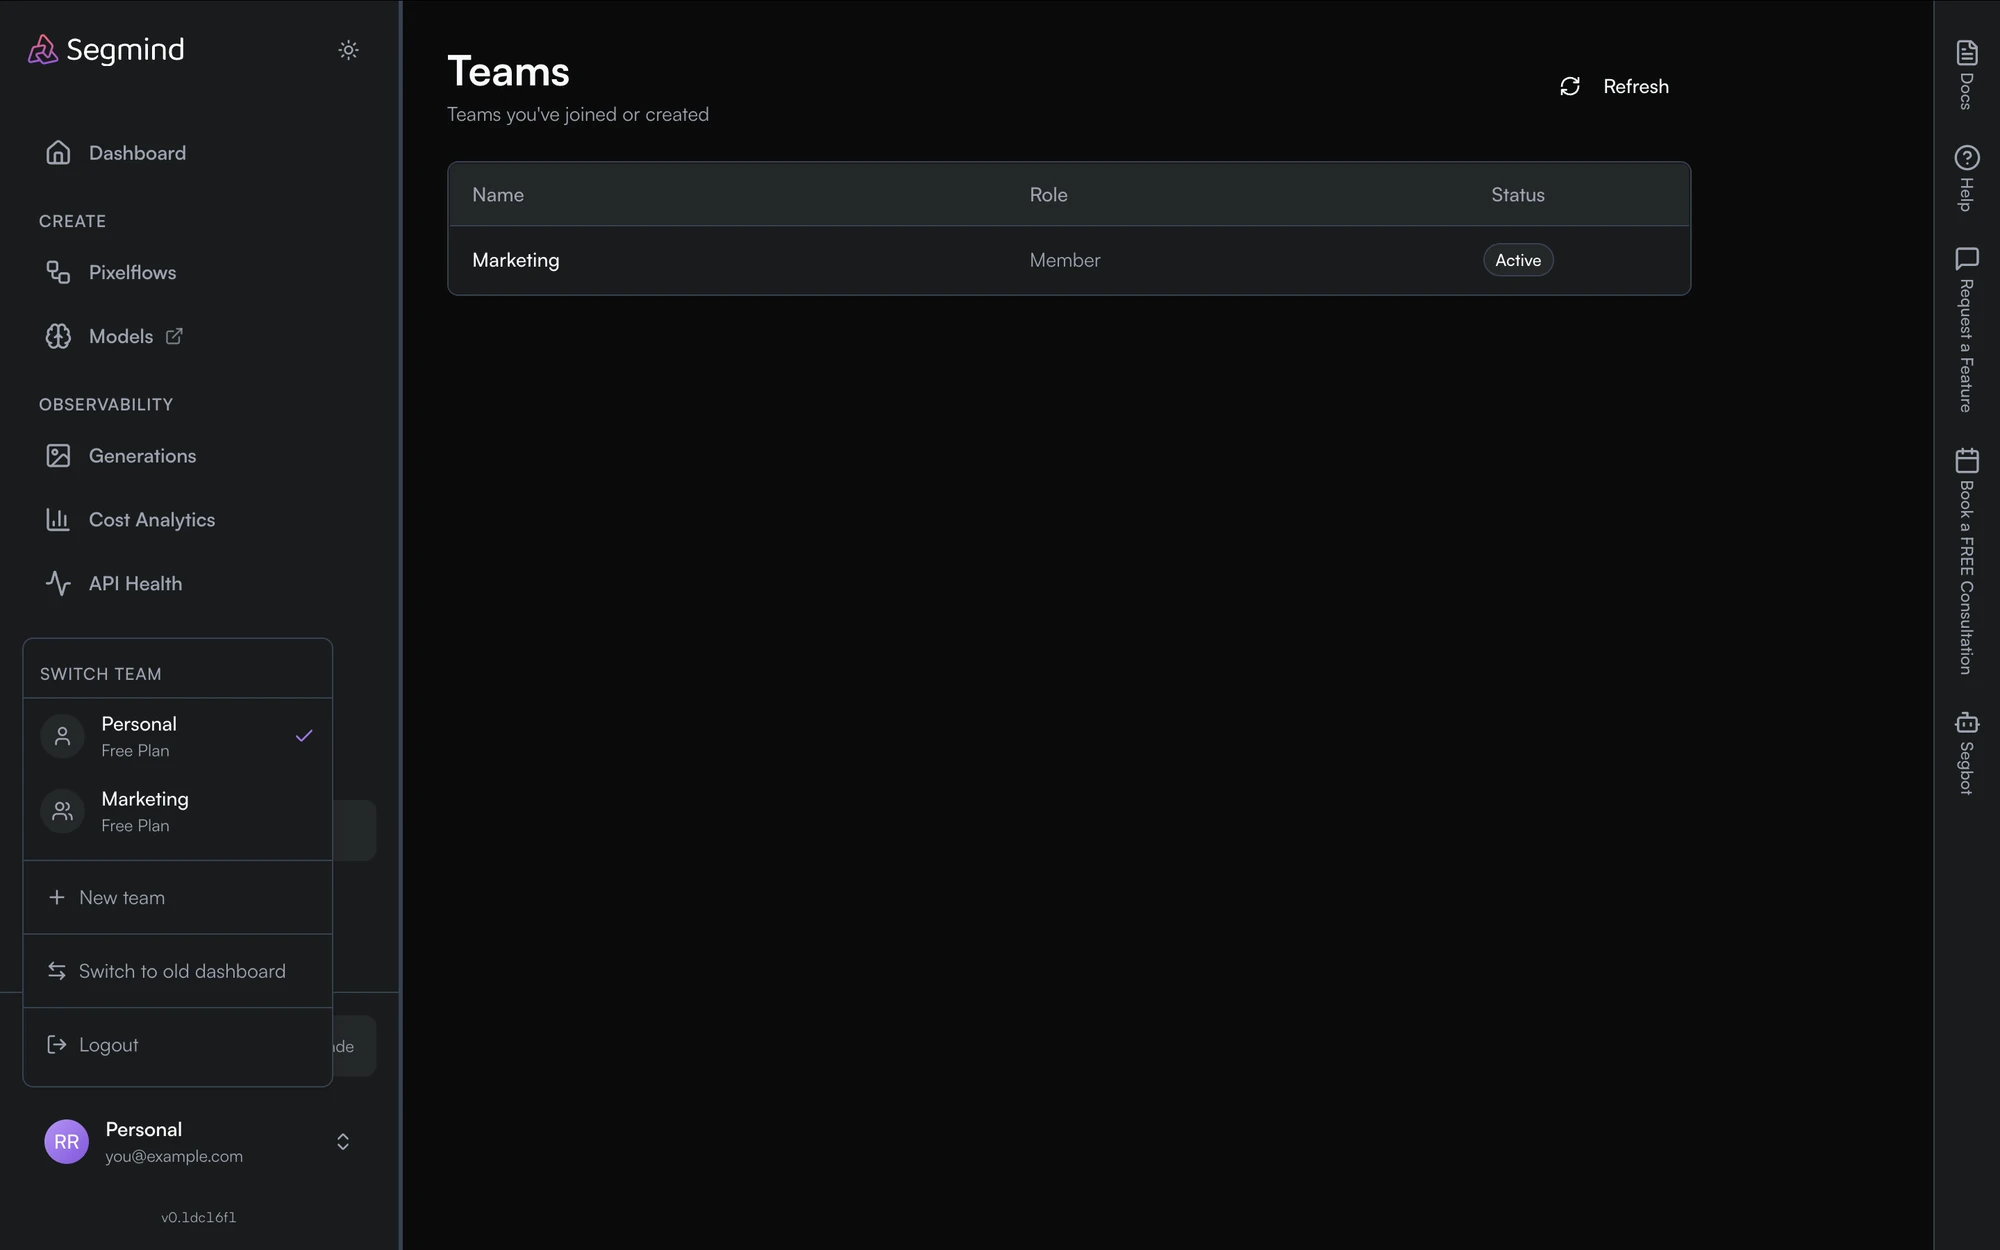
The switcher lists every workspace you belong to with the plan it is on, and a checkmark against the one you are in.
Switching workspaces changes what the rest of the console shows you — your Pixelflows, generations, credits and billing all follow the workspace you are currently in.
Create a team
Click + New team in the switcher. A name field opens in place, below the list of workspaces.
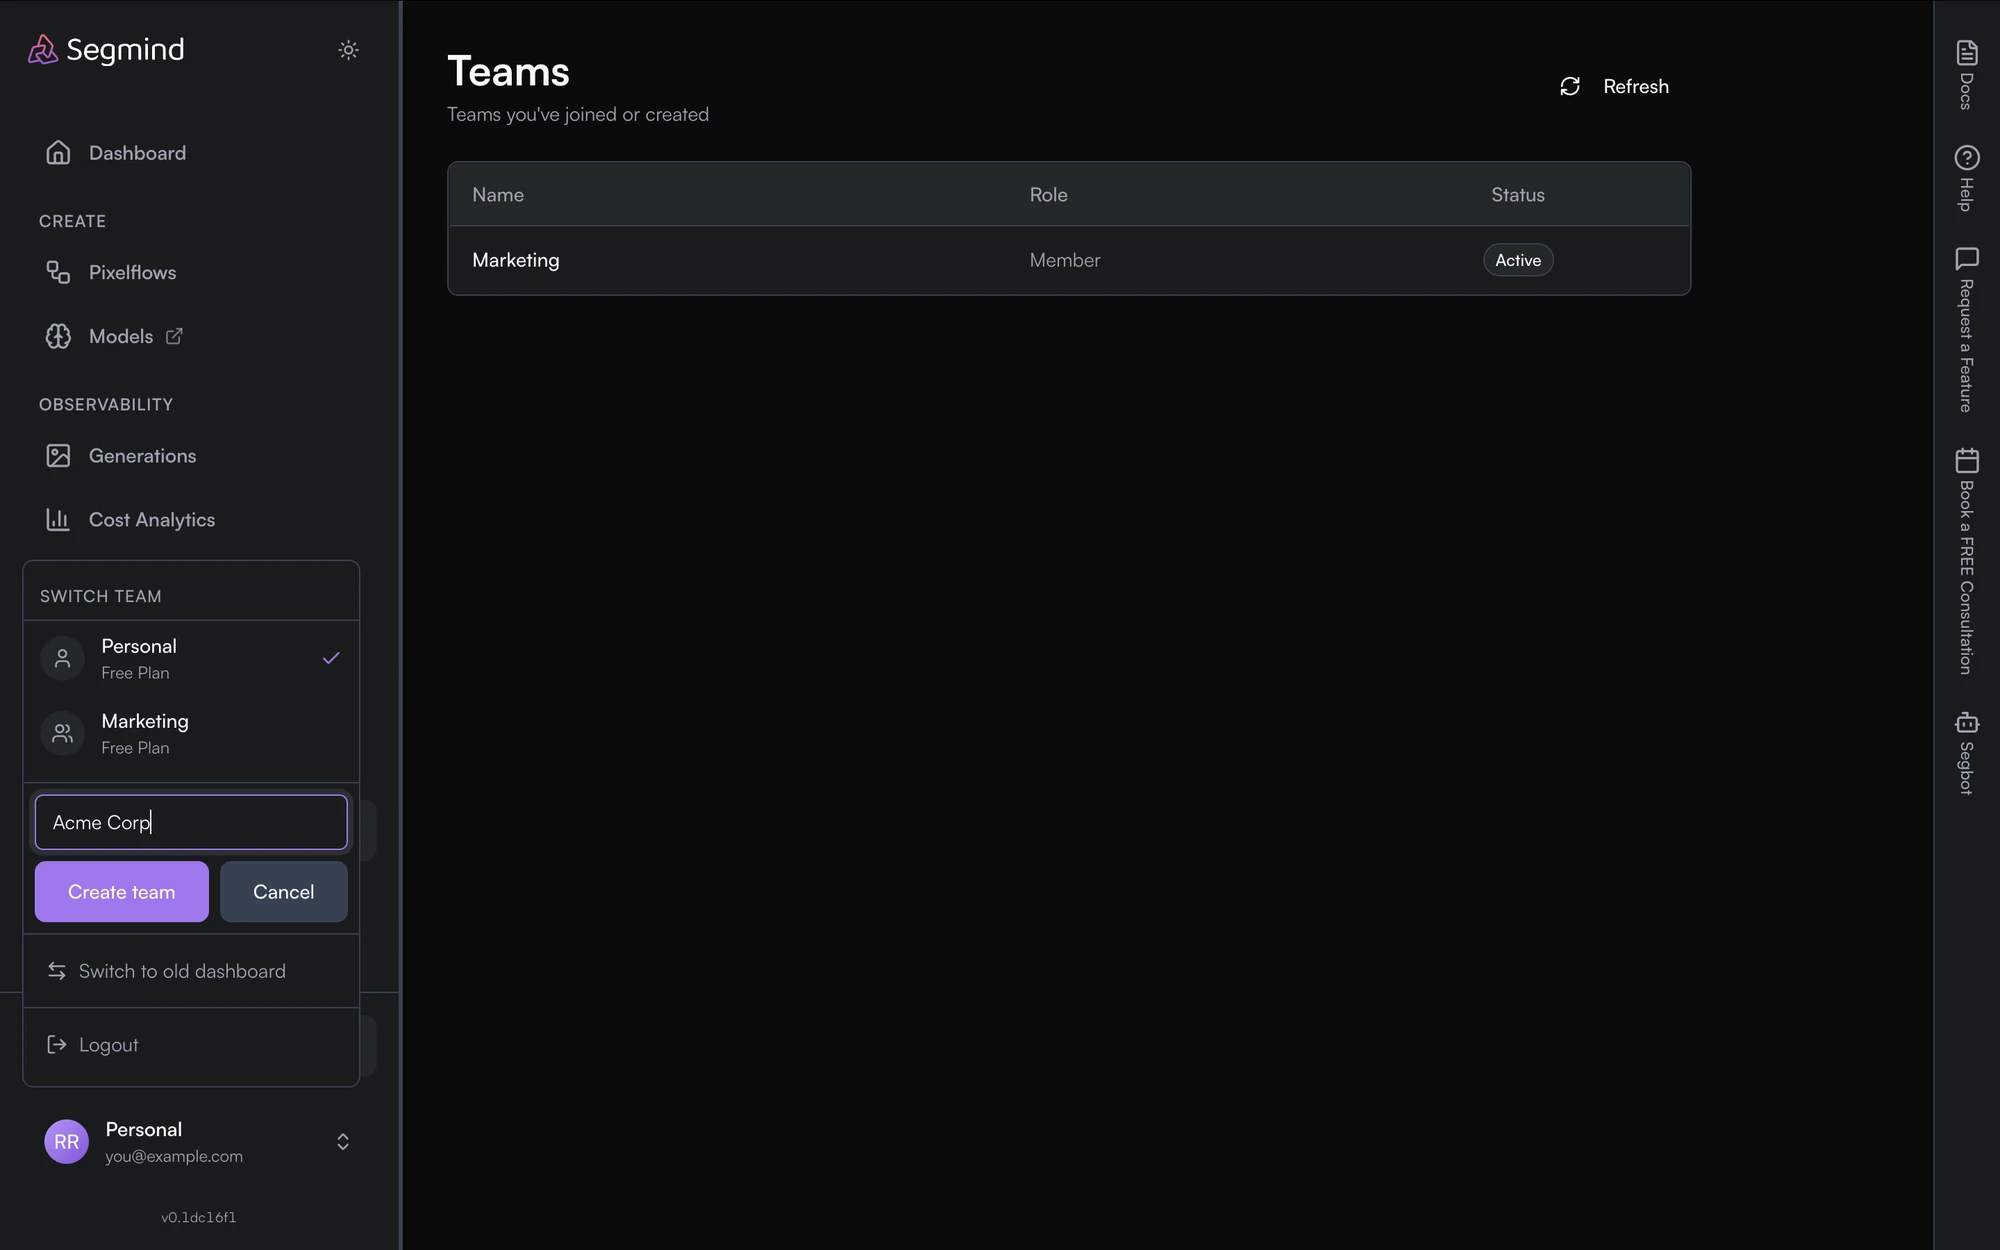
Type a name and click Create team. Two things happen straight away:
- You become the team's Owner, so you get the management page and every admin control on it.
- The console switches you into the new team, so the workspace shown at the bottom left changes. Anything you build next belongs to that team, not to your Personal workspace — switch back first if that is not what you want.
A new team starts on the Free plan with you as its only member.
See the teams you belong to
Go to Settings → Teams in the left nav.
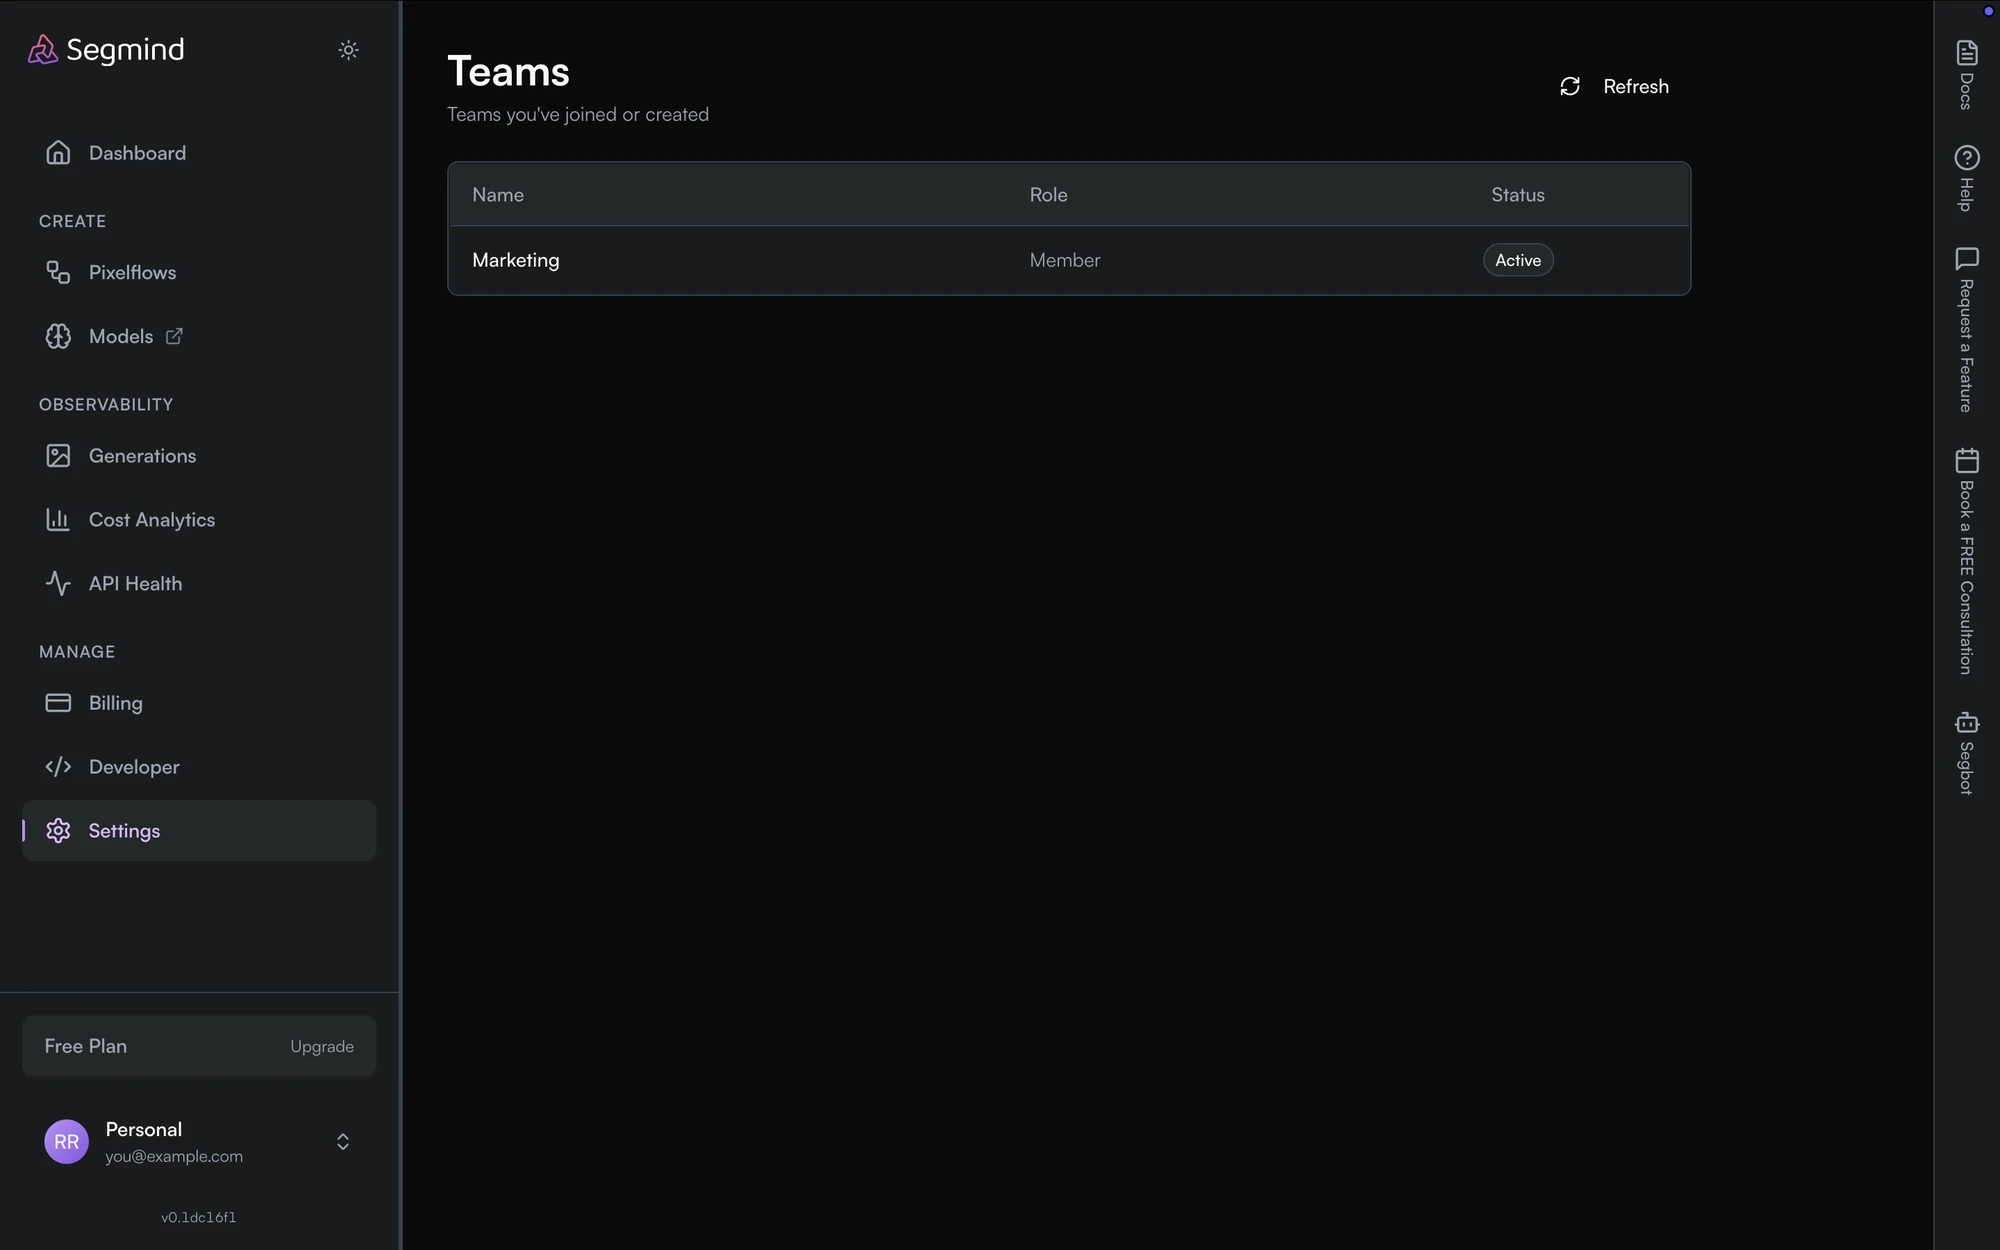
Each row shows the team's Name, your Role in it, and your Status. Select a team to open its management page.
Roles
Segmind stores two roles — Admin and Member — and derives a third, Owner, from whoever holds the team's billing.
| Role | Can do |
|---|---|
| Owner | Everything an Admin can, plus transfer billing ownership and delete the team. There is exactly one Owner: the member who holds the team's billing. |
| Admin | Manage members — invite, change roles, remove — and set per-member limits. |
| Member | Work in the team: build and run Pixelflows against the shared balance. No access to the management page. |
Because Owner is tied to billing rather than being a role you can assign, you change it by transferring ownership to another member, not by editing their role.
Manage a team
Opening a team from the Teams list takes you to its management page.
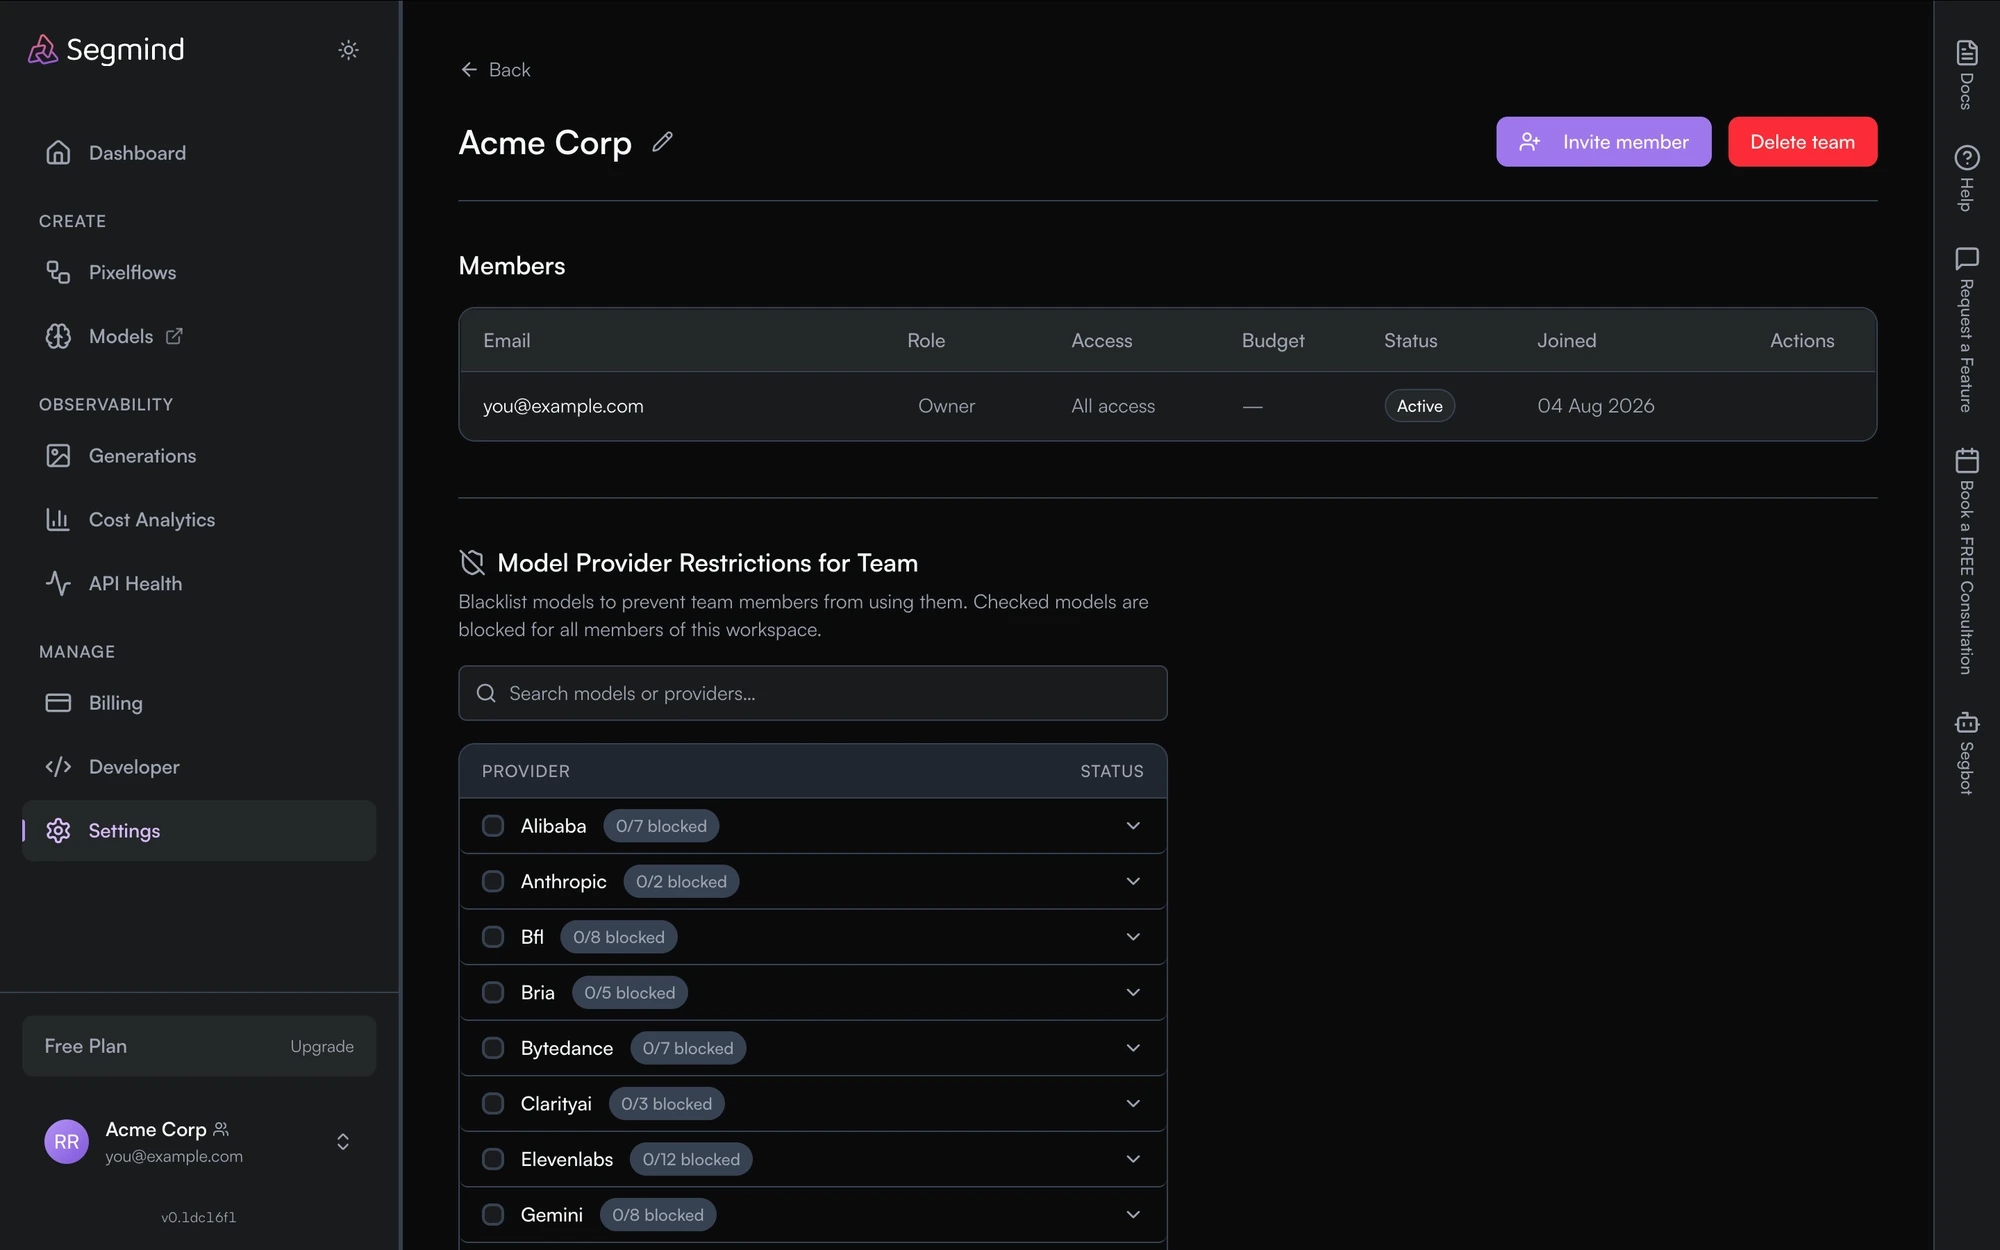
The Members table lists everyone in the team:
| Column | Shows |
|---|---|
| the member's address | |
| Role | Owner, Admin or Member |
| Access | which models they may use — All access unless you have restricted them |
| Budget | their spend cap, or — for no limit |
| Status | whether the membership is active |
| Joined | the date they accepted |
From here you can rename the team with the pencil beside its name, change a member's role, remove a member, or delete the team.
Invite a member
Invite member takes an email address and a role, and lets you set that person's limits with the invitation — so they apply from the moment it is accepted, rather than needing a second pass once they join.
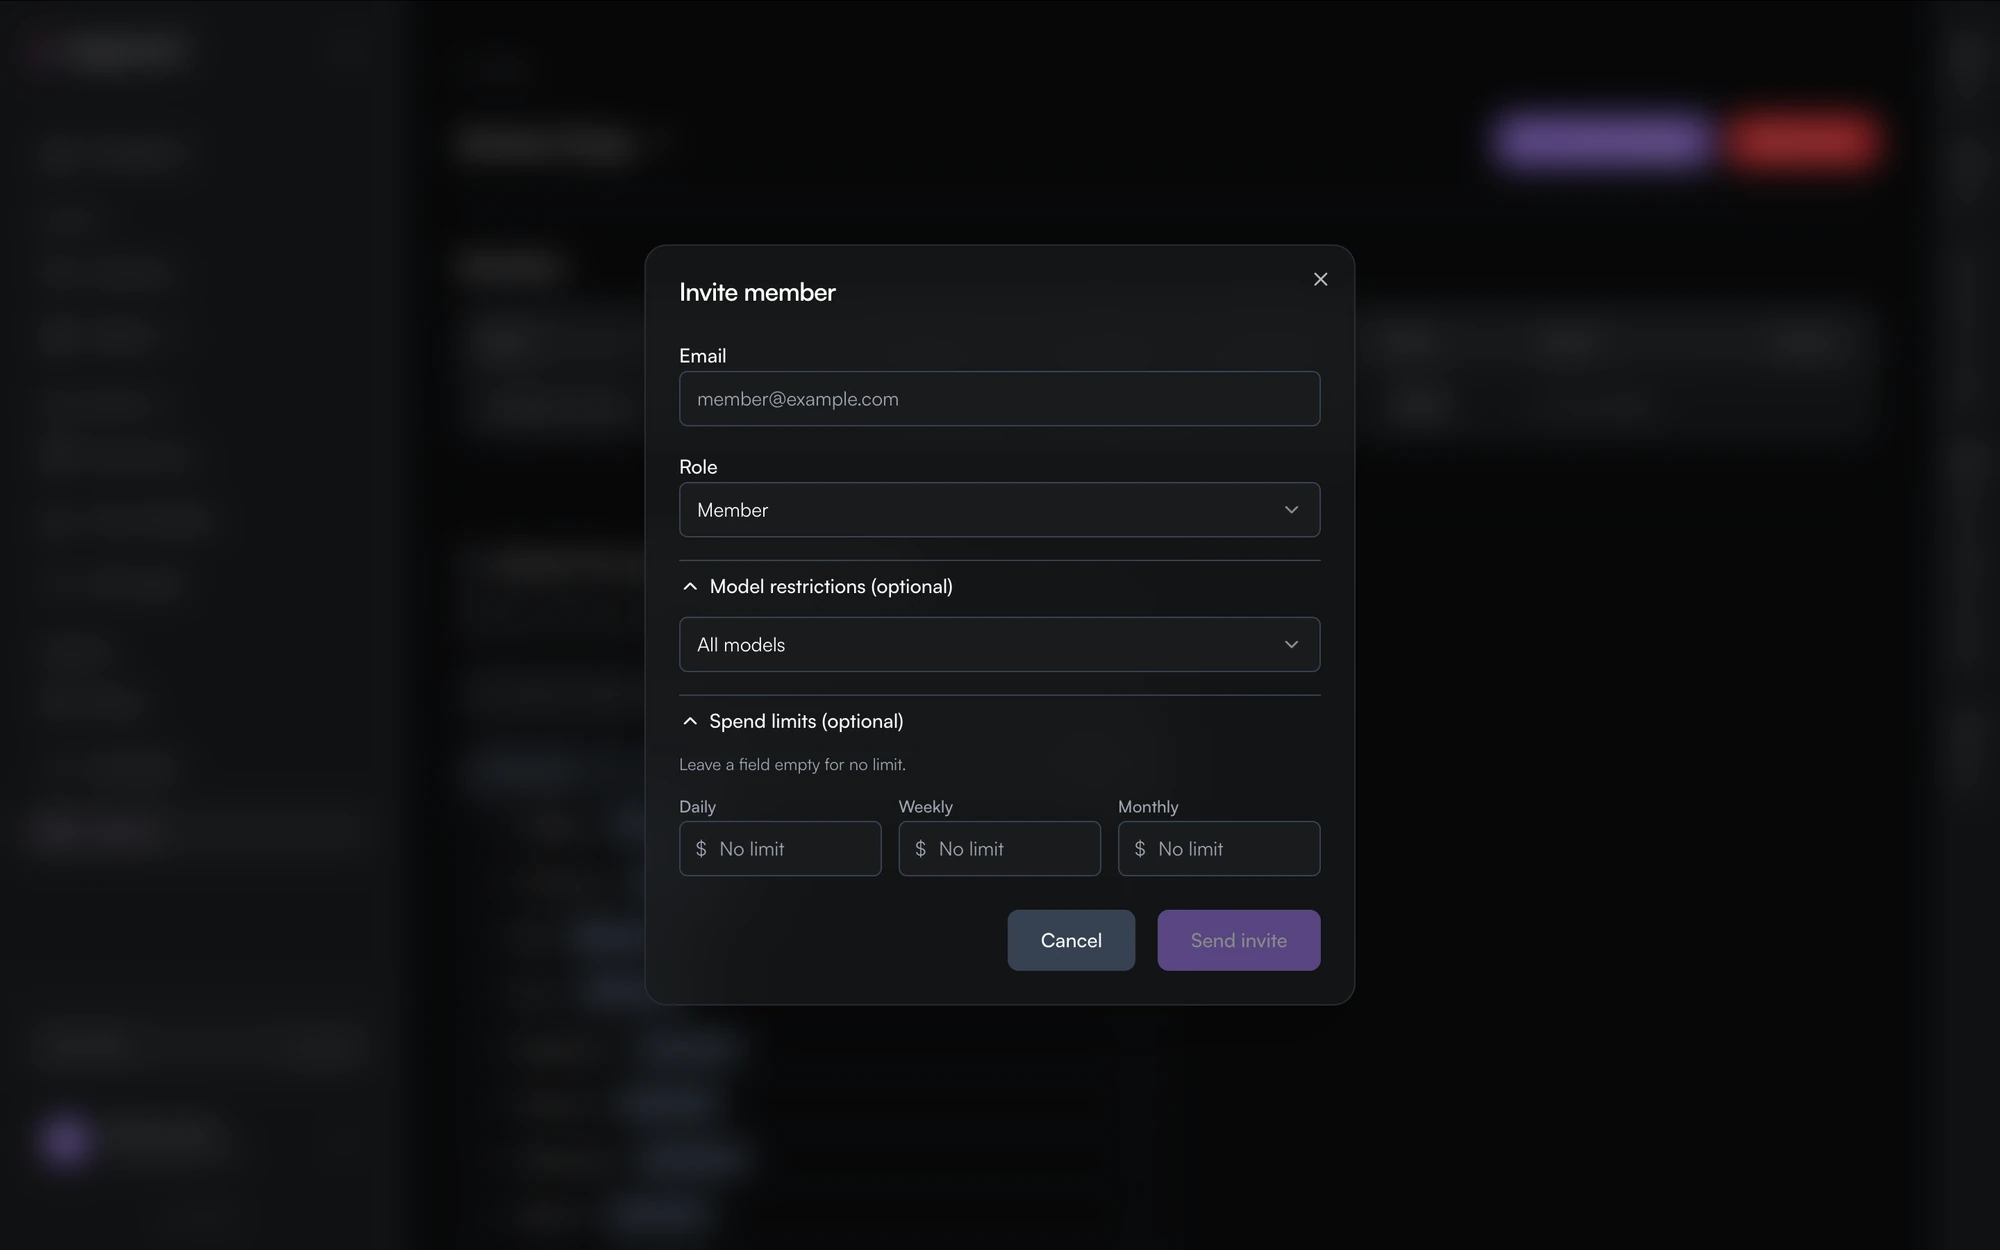
Both extras are optional and collapsed by default:
- Model restrictions — leave it on All models, or narrow it to a subset.
- Spend limits — a Daily, Weekly and Monthly cap in dollars. Leave a field empty for no limit on that period, and you can set one period without setting the others.
Restrict models for the whole team
Below the members table, Model Provider Restrictions for Team is a blocklist applied to every member of the workspace: checked models are blocked for everyone. Providers are listed with a count of how many of their models are currently blocked, and each expands to the individual models. There is a search box for finding a provider or model directly.
This is separate from the per-member restrictions set on an invite — the team blocklist applies to everybody, including admins.
Management is admin-only. If you open a team you are only a Member of, the page reads "You do not have access to this" and invites you to ask an admin for access. Ask an existing Admin or the Owner to promote you.
Per-member budgets and model restrictions do not apply to the Owner.
Track team usage
Usage is per-workspace, so switch into the team first, then use:
- Generations — what has been run in this workspace.
- Cost Analytics — what it cost, broken down over time.
- Billing — the workspace's credit balance and plan.
All three are in the left nav.
Account and Billing APIs
Check your Segmind credit balance programmatically with the get-user-credits endpoint, authenticated by your API key.
Account and Developer Settings
Find your account and developer settings in the Segmind console: profile, API keys, webhooks, and how to request account deletion.